Ah, the lower back. It’s that one area that often takes the brunt of our daily lives, whether we’re hunched over a desk, lifting weights, or simply navigating the world. If you’ve ever felt that nagging ache or stiffness, you know how disruptive it can be. Good news: a trusty foam roller for lower back issues can be a game-changer, acting like your personal massage therapist to bring much-needed relief and unlock greater comfort. But here’s the kicker – you need to use it right. Many people mistakenly roll directly on their sensitive lumbar spine, which can actually do more harm than good. Instead, the magic happens by targeting the muscles that influence your lower back, providing indirect yet powerful relief.
What Exactly is a Foam Roller and How Can It Help?
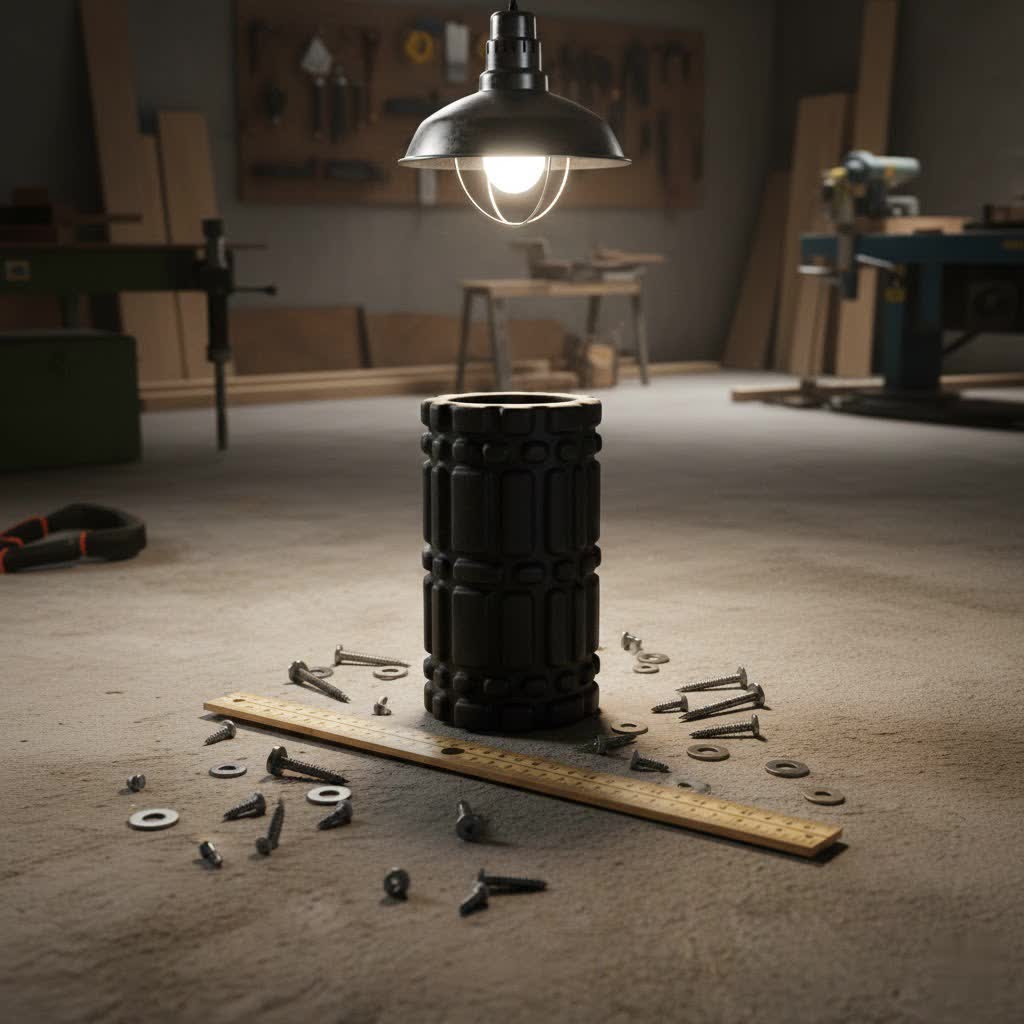
At its core, a foam roller is a lightweight, cylindrical tool used for a technique called self-myofascial release (SMR). Think of “fascia” as the connective tissue that wraps around your muscles, and when it gets tight or forms “knots” (often called trigger points), it can lead to pain, stiffness, and restricted movement. By applying pressure to these areas, a foam roller helps to smooth out those knots, improve blood flow, and release tension, giving your muscles the freedom they crave. This isn’t just about feeling good; it’s about boosting your circulation, enhancing oxygen flow to sore muscles, and supporting faster recovery after workouts. It’s an accessible way to perform deep tissue massage in the comfort of your home, making it a powerful ally against everyday aches.
Choosing Your Perfect Foam Roller for Lower Back Relief
Stepping into the world of foam rollers can feel a bit like choosing a new mattress – so many options! But finding the right one for your lower back needs is crucial for an effective and comfortable experience.
Understanding Density: Soft, Medium, or Firm?
The firmness, or density, of your foam roller dictates the intensity of the massage.
- Soft, Low-Density Rollers: These are your gentle introduction to foam rolling. Ideal for beginners or those with high sensitivity, they offer a less intense pressure, allowing you to get accustomed to the technique without overwhelming your muscles.
- Firm, High-Density Rollers: For seasoned foam rollers or those with particularly stubborn knots, a firmer roller delivers a deeper, more intense massage. Be cautious if you’re new to rolling, as these can be quite potent.
- Medium-Density Rollers: Often a great starting point for most individuals, these strike a balance between comfort and effectiveness, providing noticeable relief without being too aggressive.
|
Our Picks for the Best Foam Roller in 2026
As an Amazon Associate I earn from qualifying purchases.
|
||
| Num | Product | Action |
|---|---|---|
| 1 | Tiger Ball Peanut 2.4 Foam Roller – Deep Tissue Massage Ball for Back & Neck, Myofascial Trigger Point Therapy Tool, Dual Silicone Balls with Gription – Compact, Portable, Non-Slip Recovery Roller |

|
| 2 | Amazon Basics High Density Foam Roller |
|
| 3 | 321 Strong Foam Roller - Medium Density Deep Tissue Massager for Muscle Massage and Myofascial Trigger Point Release, with 4K eBook |
|
| 4 | Amazon Basics High Density Foam Roller |
|
| 5 | Amazon Basics High Density Foam Roller |
|
| 6 | High Density Foam Roller Massager for Deep Tissue Massage of The Back and Leg Muscles - Self Myofascial Release of Painful Trigger Point Muscle Adhesions - 13" Blue |
|
| 7 | Amazon Basics High Density Foam Roller |
|
| 8 | TriggerPoint Grid 1.0 Foam Roller - 13" Multi-Density Massage Roller for Deep Tissue & Muscle Recovery - Relieves Tight, Sore Muscles & Kinks, Improves Mobility & Circulation - Targets Key Body Parts |
|
| 9 | Amazon Basics High Density Foam Roller |
|
| 10 | Yes4All High-Density EPP Round Back Roller Foam, Exercise Foam Roller for Yoga, Pilates & Stretching - 12, 18, 24, 36 inch |
|
The Role of Texture: Smooth vs. Patterned
Beyond density, the surface texture also plays a significant role.
- Smooth Rollers: Offering even pressure across the contact area, smooth rollers are excellent for beginners or for general muscle relaxation. They provide a consistent massage experience.
- Textured Rollers: Featuring ridges, grids, or knobs, these rollers are designed to mimic a masseuse’s fingers, targeting specific muscle knots and providing a deeper, more precise massage. If you’re tackling specific trigger points, a textured roller can be incredibly effective, but it’s wise to start with a smoother option if you’re sensitive.
Size Matters: Length and Diameter
The dimensions of your foam roller impact its versatility and ease of use.
- Length: Longer rollers (around 36 inches) are highly versatile, especially for your back, as they can span your entire spine. Shorter rollers (12-18 inches) are great for portability and targeting smaller areas like arms and calves.
- Diameter: Most standard rollers have a 6-inch diameter, suitable for most users. Smaller diameters (4 inches) can provide a more targeted, deeper massage, while larger ones offer a more generalized experience, which might be better for beginners. For a truly gentle start, half-round rollers, flat on one side, can be a good stepping stone.
“Choosing the right foam roller isn’t a one-size-fits-all situation,” says Amelia Sterling, Lead Recovery Specialist at Reviewters Recovery. “It’s about matching the tool to your body’s needs and your comfort level. Always start conservative with density and texture, and listen to what your body tells you.”
The Golden Rule: How to Safely Foam Roll for Lower Back Pain
This is where many people go wrong. You should generally avoid rolling directly on your lower back (lumbar spine). The lumbar spine is designed for stability, and direct pressure from a foam roller can potentially overstretch ligaments or place undue stress on your vertebrae. The key to relieving lower back pain with a foam roller is to target the surrounding muscle groups that often contribute to lower back tension and stiffness.
Here’s how to focus on those influential areas with specific, effective techniques:
Warm-Up First!
Before you even touch the foam roller, spend 2-3 minutes doing some light cardio or gentle stretches to get your blood flowing and muscles ready. A simple walk or some cat-cow stretches will do the trick.
1. Gluteal Muscles and Piriformis Release
Why it helps: Tight glutes and the piriformis muscle (deep in the buttock) can pull on your pelvis and lower back, causing discomfort.
- How to do it: Sit on the foam roller, placing it just under one buttock. Cross the ankle of that same side over the opposite knee. Place your hands on the floor behind you for support. Slowly roll back and forth, and gently lean to the side of the crossed leg to increase pressure on any tender spots.
- Focus: Spend 30-60 seconds on each side, breathing deeply into any areas of tension.
2. Hip Flexor Release
Why it helps: Prolonged sitting can lead to tight hip flexors, which can tilt your pelvis forward and increase the arch in your lower back, causing pain.
- How to do it: Lie face down with the foam roller positioned horizontally under one hip/upper thigh, perpendicular to your body. Allow your upper body to rest on your forearms. Gently roll back and forth, moving from your hip bone down towards your upper thigh.
- Focus: Maintain a gentle pressure and roll for 30-60 seconds per side.
3. Hamstring Release
Why it helps: Tight hamstrings (the muscles on the back of your thighs) can also pull on the pelvis, contributing to lower back strain.
- How to do it: Sit on the floor with the foam roller under one hamstring. Use your hands for support behind you. Keep one leg straight on the roller and bend the other for stability, or cross one leg over the other for more pressure. Slowly roll from just below your glutes down to above your knee.
- Focus: Roll each hamstring for 30-60 seconds, pausing on any particularly tight spots.
4. Quadratus Lumborum (QL) Release
Why it helps: The QL is a deep muscle on each side of the lower spine, often a culprit in chronic lower back pain.
- How to do it: Lie on your side with the foam roller positioned just above your hip bone, along the side of your waist. Use your forearms and feet for support. Gently lean into the roller and roll slightly forward and backward to release tension.
- Focus: Perform this carefully, spending 30-45 seconds on each side.
5. Thoracic Spine (Upper and Mid-Back) Mobilization
Why it helps: Stiffness in your upper back can force your lower back to compensate, leading to pain. Mobilizing the thoracic spine helps improve overall spinal flexibility.
- How to do it: Lie on your back with the foam roller placed horizontally beneath your upper back, roughly between your shoulder blades. Clasp your hands behind your head for support, keeping your elbows in. Lift your hips slightly off the floor and slowly roll up and down your upper and mid-back. Avoid excessive arching of the lower back.
- Focus: Roll slowly for about 60 seconds, allowing any gentle “pops” to occur as tension releases in your joints.
6. Sacral Roll / Pelvic Rock
Why it helps: This gentle movement helps mobilize the sacrum (the triangular bone at the base of your spine) and surrounding pelvic muscles, which directly impacts lower back comfort.
- How to do it: Lie flat on your back and place the foam roller horizontally under your sacrum, which is below your belt line and above your glutes. Your lower back should feel supported, not directly pressed. You can gently rock your knees side to side, or bring both knees to your chest and then extend one leg straight, letting it hang towards the floor to open the hip and relax the low back.
- Focus: This is a gentle stretch and massage. Hold for 30 seconds to a minute, breathing deeply.
General Tips for Safe and Effective Rolling:
- Roll Slowly: Don’t rush it. The slower you go, the more effective the release. Blazing through won’t give you the relief you seek.
- Breathe Deeply: Relax into the pressure. Deep breaths help your muscles release tension.
- Pause on Tender Spots: When you find a tender spot, pause on it for 20-30 seconds, allowing the pressure to sink in and the muscle to relax.
- Consistency is Key: Regular foam rolling, even just a few times a week, yields the best long-term benefits.
- Listen to Your Body: It’s okay to feel some discomfort, but never roll through sharp or radiating pain. If it hurts too much, ease up or stop.
Beyond Relief: The Broader Health Benefits and Recovery Role
Using a foam roller for lower back issues extends beyond simply alleviating discomfort. It’s a proactive step towards better overall musculoskeletal health. Regular self-myofascial release can significantly reduce muscle stiffness and chronic tension, which often leads to improved posture. By increasing blood flow and oxygen delivery to your muscles, it helps speed up recovery after intense workouts, reducing delayed onset muscle soreness (DOMS). Enhanced flexibility and range of motion are also significant benefits, making everyday movements easier and more fluid. Essentially, foam rolling empowers you to take an active role in your body’s maintenance, complementing other therapies like stretching and even physical therapy.
Weaving Foam Rolling into Your Daily Rhythm
Making foam rolling a consistent part of your routine is easier than you think. You can incorporate it:
- Pre-Workout: A few minutes of rolling can warm up your muscles and improve their readiness for exercise.
- Post-Workout: Help kickstart muscle recovery and reduce stiffness after a tough session.
- End of Day: Use it as a wind-down routine to release accumulated tension from daily activities or prolonged sitting.
Aim for 10-15 minutes, 3-4 times a week, or whenever you feel particularly stiff or tight. Consistency, not intensity, is your goal for sustained relief and improved mobility.
When to Seek Professional Guidance
While foam rolling is a fantastic self-care tool, it’s not a substitute for professional medical advice. If your lower back pain persists for more than a week, radiates down your legs, worsens with movement, or is severe and chronic, it’s crucial to consult a healthcare professional. Conditions like herniated discs, sciatica, or nerve impingement require a proper diagnosis and tailored treatment plan from a doctor or physical therapist. Foam rolling can be a valuable complement to professional care, but it should never replace it.
Frequently Asked Questions About Foam Rolling for Lower Back
Q: Can foam rolling directly on my lower back be harmful?
A: Yes, generally, it’s advised to avoid rolling directly on the lumbar spine as it can overstretch ligaments and put excess pressure on the vertebrae, potentially worsening pain or causing instability.
Q: What’s the best type of foam roller for a beginner with lower back pain?
A: A softer, low-density, smooth foam roller is typically best for beginners. It provides a gentler massage, allowing you to get used to the technique without discomfort.
Q: How long should I spend on each muscle group when using a foam roller for lower back issues?
A: Aim for 30-60 seconds on each muscle group. If you find a particularly tender spot, you can pause on it for 20-30 seconds, allowing the muscle to release.
Q: How often should I use a foam roller for lower back relief?
A: Incorporating foam rolling into your routine 3-4 times a week is generally recommended for consistent benefits, or whenever you feel muscle tightness.
Q: Besides my lower back, what other areas should I focus on for relief?
A: Focus on muscle groups that influence your lower back, such as your glutes, piriformis, hip flexors, hamstrings, quadratus lumborum, and the thoracic (upper) spine.
Q: Is foam rolling supposed to be painful?
A: While you might feel some discomfort or an intense sensation, it should never be sharply painful or excruciating. If it is, reduce the pressure or move to a less sensitive area.
Embracing a More Comfortable You
Tackling lower back discomfort with a foam roller is a journey of self-discovery and consistent effort. By understanding the proper techniques – focusing on the influential muscle groups rather than directly on the lumbar spine – and choosing the right tool for your body, you can unlock profound relief. This isn’t just about managing pain; it’s about fostering greater flexibility, enhancing recovery, and taking an active role in your body’s well-being. So, grab your foam roller, listen to your body, and start rolling your way to a more comfortable, resilient you. The path to relief from lower back tension is literally at your fingertips – or rather, under your foam roller.